Shake And squeeze Effect Editing
🔺About video
ಗೆಳೆಯರೆ ಎಲ್ಲರಿಗು ಈ ಹೊಸ ಬ್ಲಾಗ್ ಗೆ ಸ್ವಾಗತ ಇಲ್ಲಿ Squeeze Effect video editingವಿವರಿಸಲಾಗಿದೆ.
ಈ ಎಡಿಟಿಂಗ್ ಕಲಿಯಲು ತುಂಬಾ ಸರಳವಾಗಿದೆ ಹಾಗಾಗಿ ಬ್ಲಾಗ್ ಕೊನೆಯವರೆಗೆ ಓದಿ.ಹಾಗೆ ವಿಡಿಯೋ ಇಷ್ಟ ಆದರೆ ಲೈಕ್ ಮಾಡಿ ಹಾಗೆ ಮತ್ತಷ್ಟು "ಕನ್ನಡ"ಎಡಿಟಿಂಗಾಗಿ ನಮ್ಮ ಚಾನಲನ ಸಬಸ್ಕ್ರೈಬ್ 🔔 ಮಾಡ್ಕೊಳ್ಳಿ.
 |
| ಸಬಸ್ಕ್ರೈಬ್ ಮಾಡಲು 👆ಕ್ಲಿಕ್ ಮಾಡಿ |
🔺Step 1
First Click below and import the book Mark preset .
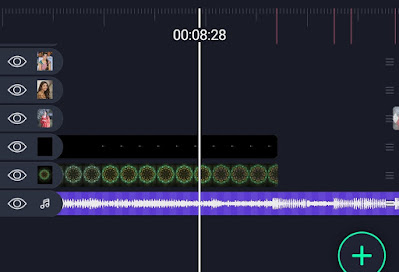
Ok next add two overlay is given below from first bookmark to 2nd bookmark and ✂cut the extra part after second book Mark.
 |
| Overlay adding |
 |
| Download |
🔺Step 2
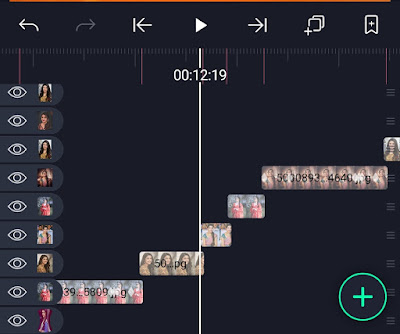
After adding the overlay now you add the photo from 2nd book Mark to 3rd book suppose your image Will extra then you cut it's right side. Next you add photo from 3rd book Mark to 4th book Mark this type you add all photos to end of the book Mark. Below shown in image.
 |
| Adding photos |
🔺Step 3
Now you come starting of the video and add below given text png. And drag it from firs book Mark to 2nd book Mark.
 |
| Png |
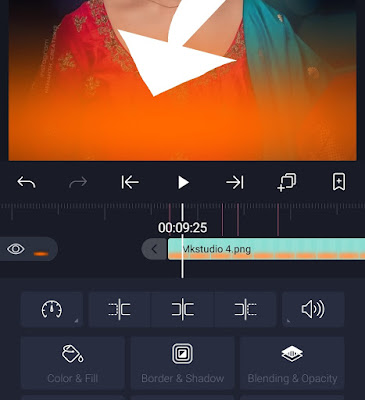
After adding png come to 2nd book Mark and click ➕plus icon and add footer png. Png is given below⬇ and drag it from 2nd book Mark to end of the video. And adjust is below side.
 |
| Footer png |
 |
| Adding footer |
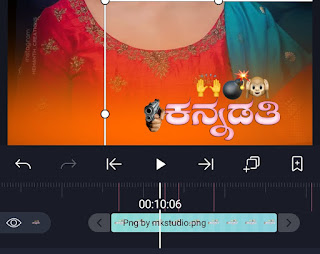
After adding footer you again add text png and drag it 2nd book Mark to end of the video. And adjust it on below footer.
 |
| Adjusting png on footer |
Come to second book Mark Now you add a effect on video. And select that layer again and go to blending and option and slect there lighten option and click on screen option.
 |
| Effect |
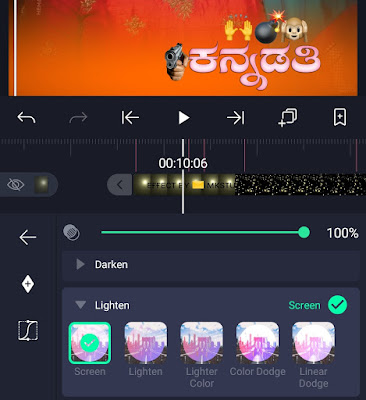 |
| Bleeding and opacity |
🔺Step 4
Now you go to given effect preset and select that photo and copy that effects and come your current project and sleect your photos and paste that effect to every photo.
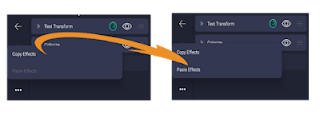 |
| Copy and paste effect |
 |
| Preset |
Now your video is full ready now you click share button on the upper side.
 |
| Share button |
And now click export option your video Will be exported.


Super video Anna Nana namber 9353656891
ReplyDelete